When creating a shipment in ShipSavvy, we will now automatically show you all the best pick up and drop off options available to you, based on your ship from location. This means that you’ll be able to compare savings for every shipment based not only on carriers and service levels, but also in how you plan to get the packages to us at ShipSavvy (or our carrier partners). Sometimes you need to urgently get the package moving, and so you can see all of the options where you can drop off at a ShipSavvy Location or one of our Carrier partners; or sometimes the packages are less urgent and you want to have your orders picked up using SavvyPickup or by one of our Carrier Partners.
Step-by-step: Create a shipment
Start a new shipment
Go to + New Shipment, at the top right
In Ship From, choose from:
a saved address (your address)
or create a new address
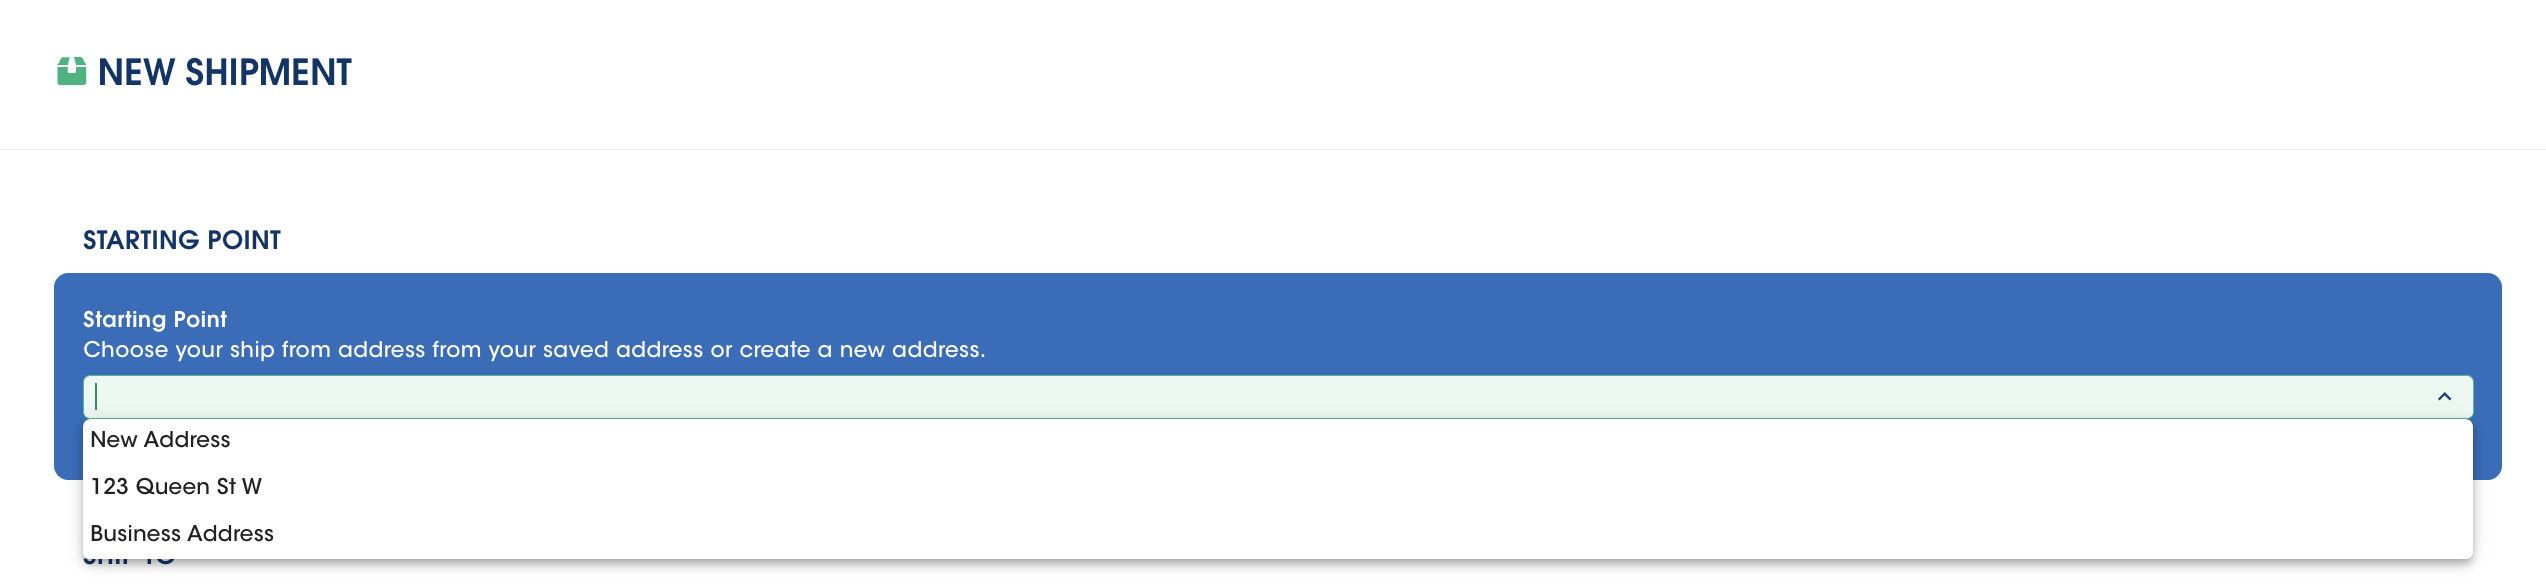
3. You can click the checkbox to make this address your default “ Ship From” address.
Enter the Ship To address (recipient)
Enter the Recipient (Ship To) details (name, address, contact info)
Quick tip: Double-check the postal/ZIP code — this is the most common cause of label issues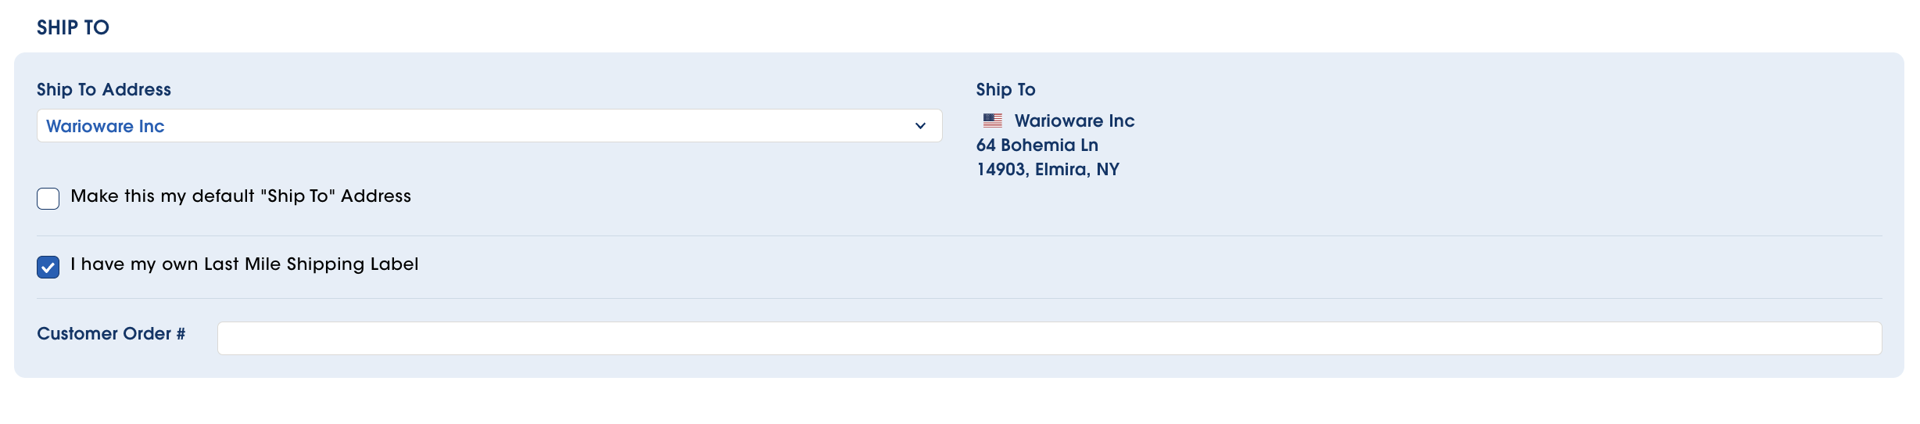
Enter your Items / package details (weight, dimensions, contents, etc.).
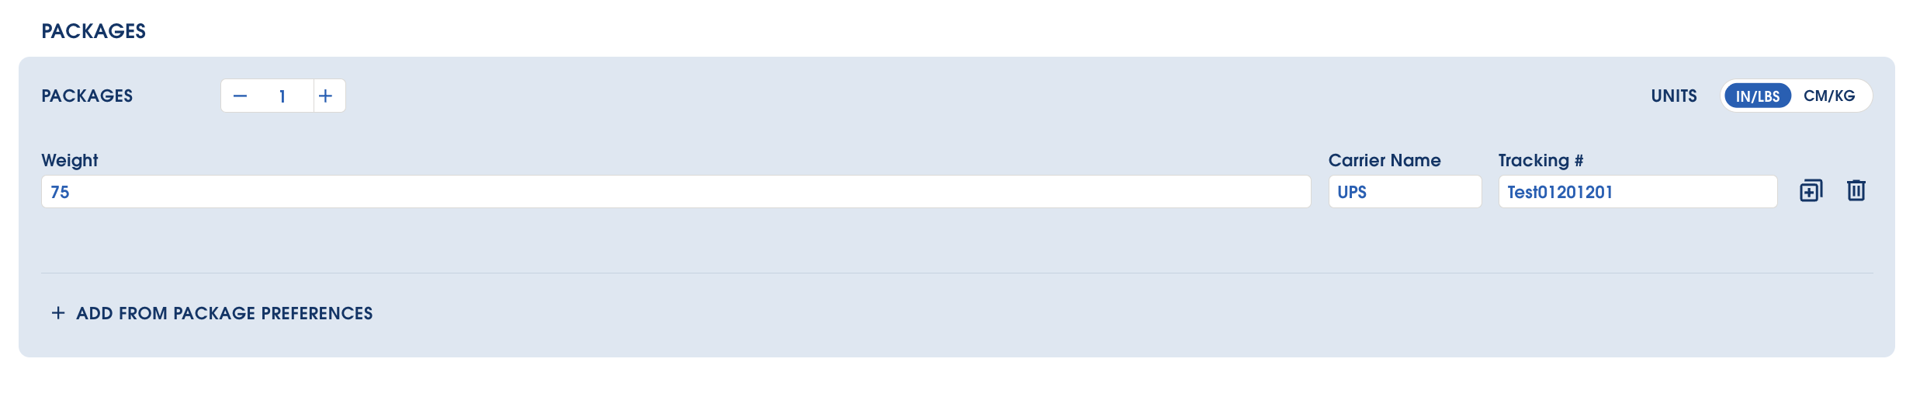
Tip: If you’re not sure about weight, use your best, accurate estimate. You can adjust later if needed and we will always correct it to the actual weight and dimensions when given to our carrier partners.
Go to the Select Shipping Services page
Click Checkout to reach Select Shipping Services (this is where you will see ALL package pickup and package drop off options available to you).
Effective Jan. 2026, users will likely see more shipping choices than before, and the method or drop off or pick up is indicated, so you know how you need to get the packages to us, to get the best savings possible.
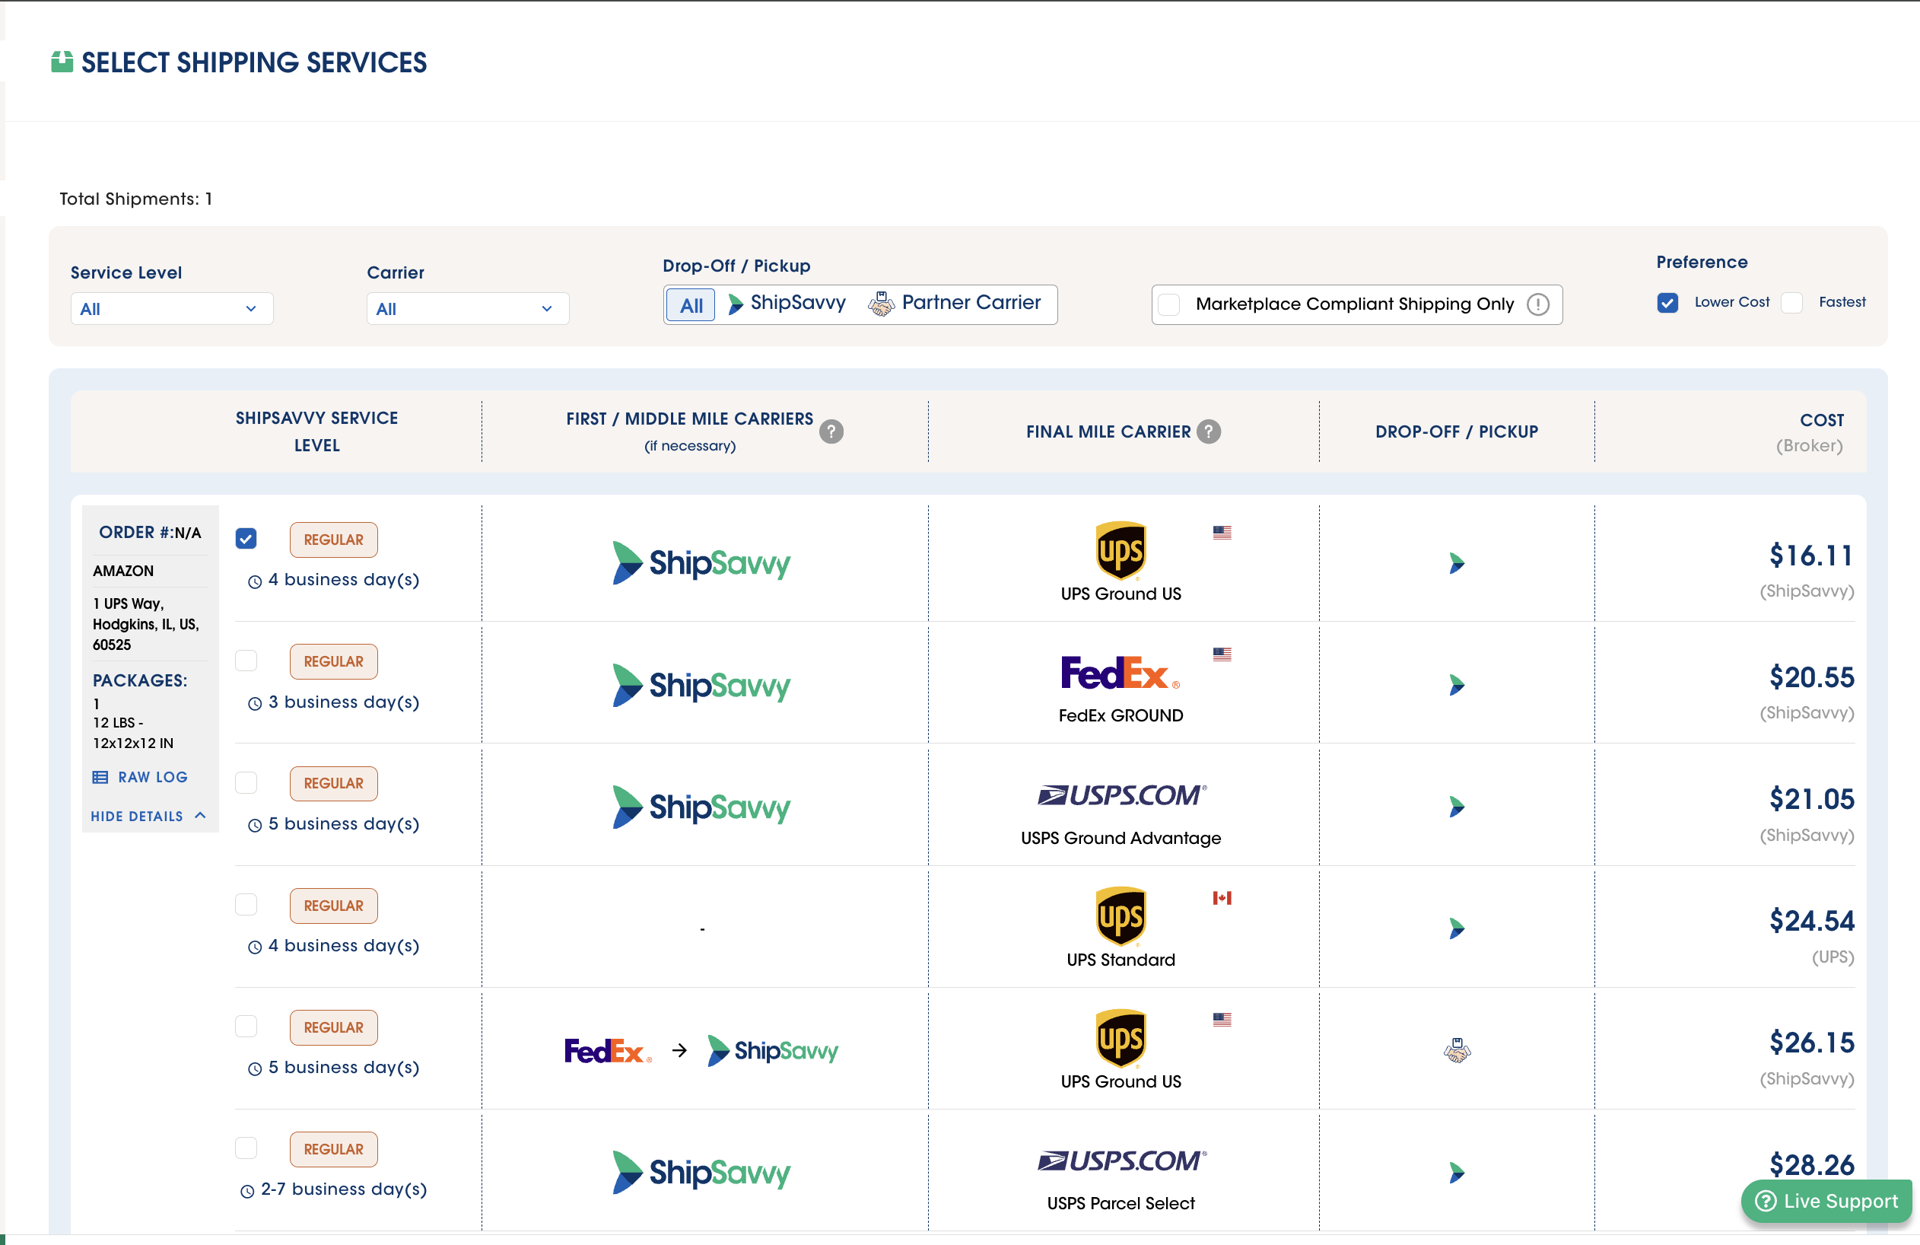
Choose how your parcel will move (Drop-off vs Pickup)
On the Select Shipping Services page, each service option appears as a row and includes an icon that tells you how the parcel will move:
ShipSavvy logo = ShipSavvy Drop-off
Drop the parcel at a ShipSavvy warehouse or drop-off point (DOP).Handshake / Partner icon = Partner Pickup (First-mile)
A partner carrier handles pickup / first-mile from your Ship From address.Both icons = Direct-label option (drop-off or partner pickup)
You can either drop at any ShipSavvy Location or use the partner carrier for pickup (update in progress to ensure this displays correctly in all cases).
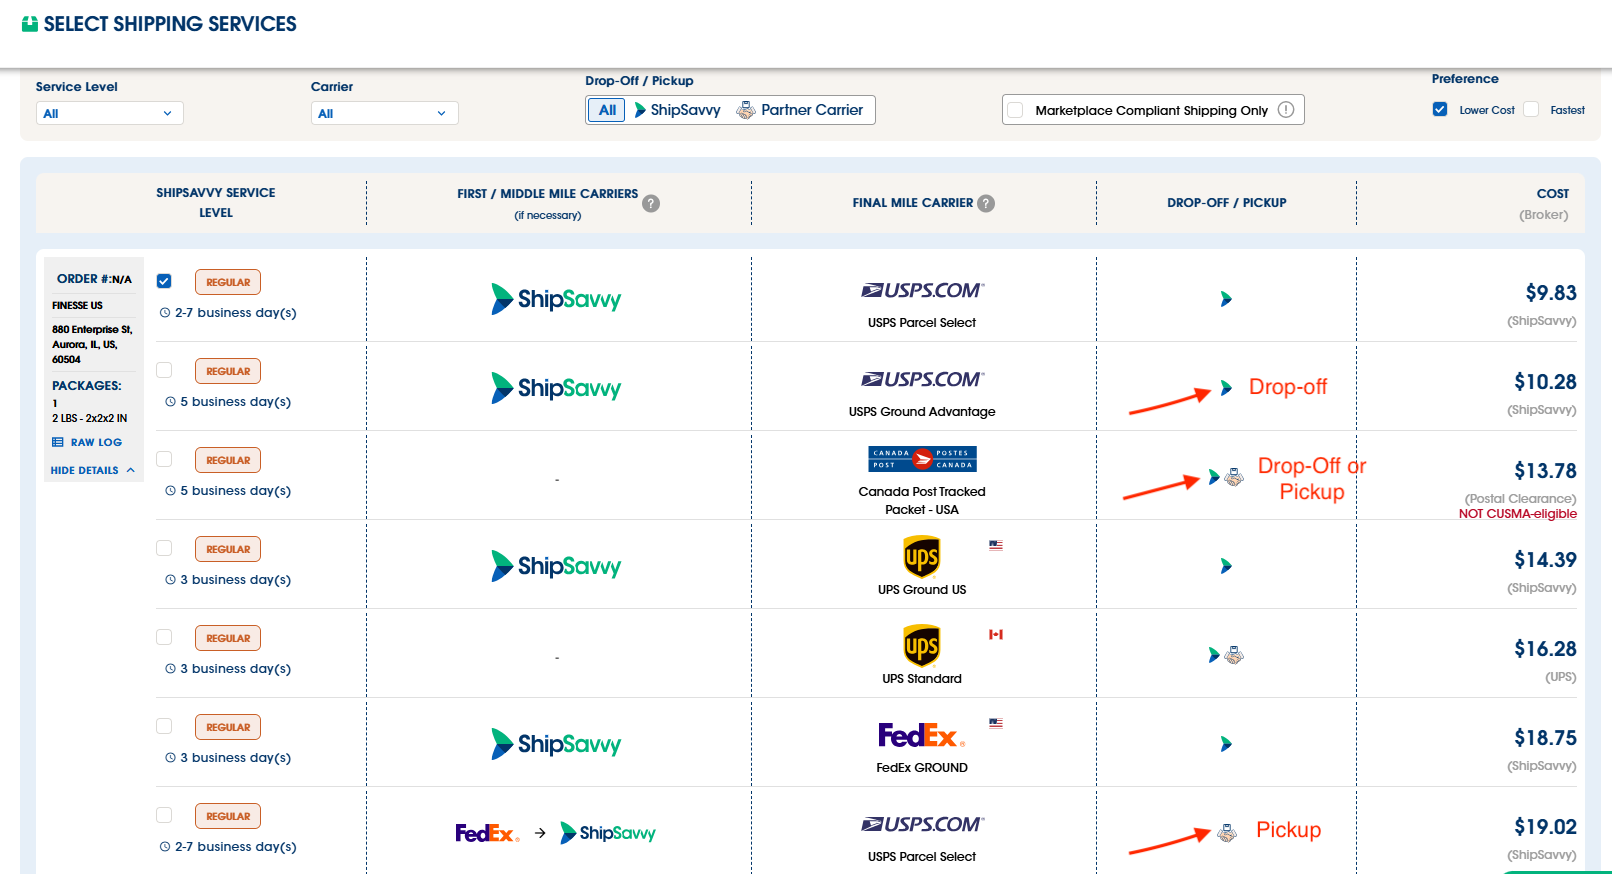
Note: Shipping options presented are based on your Ship From postal code.
Addresses inside the Greater Toronto Area (GTA) will likely see ShipSavvy drop-off + direct carrier + partner pickup
Addresses outside the Greater Toronto Area (GTA) you’ll see direct carrier + partner pickup only (no ShipSavvy drop-off options since today all our locations are in GTA).
Use filters to find the best option (optional)
Use Preference to sort results, like:
Lowest cost first
Fastest first
Use filters to narrow results by:
Carrier
Service level (regular, express, etc.)
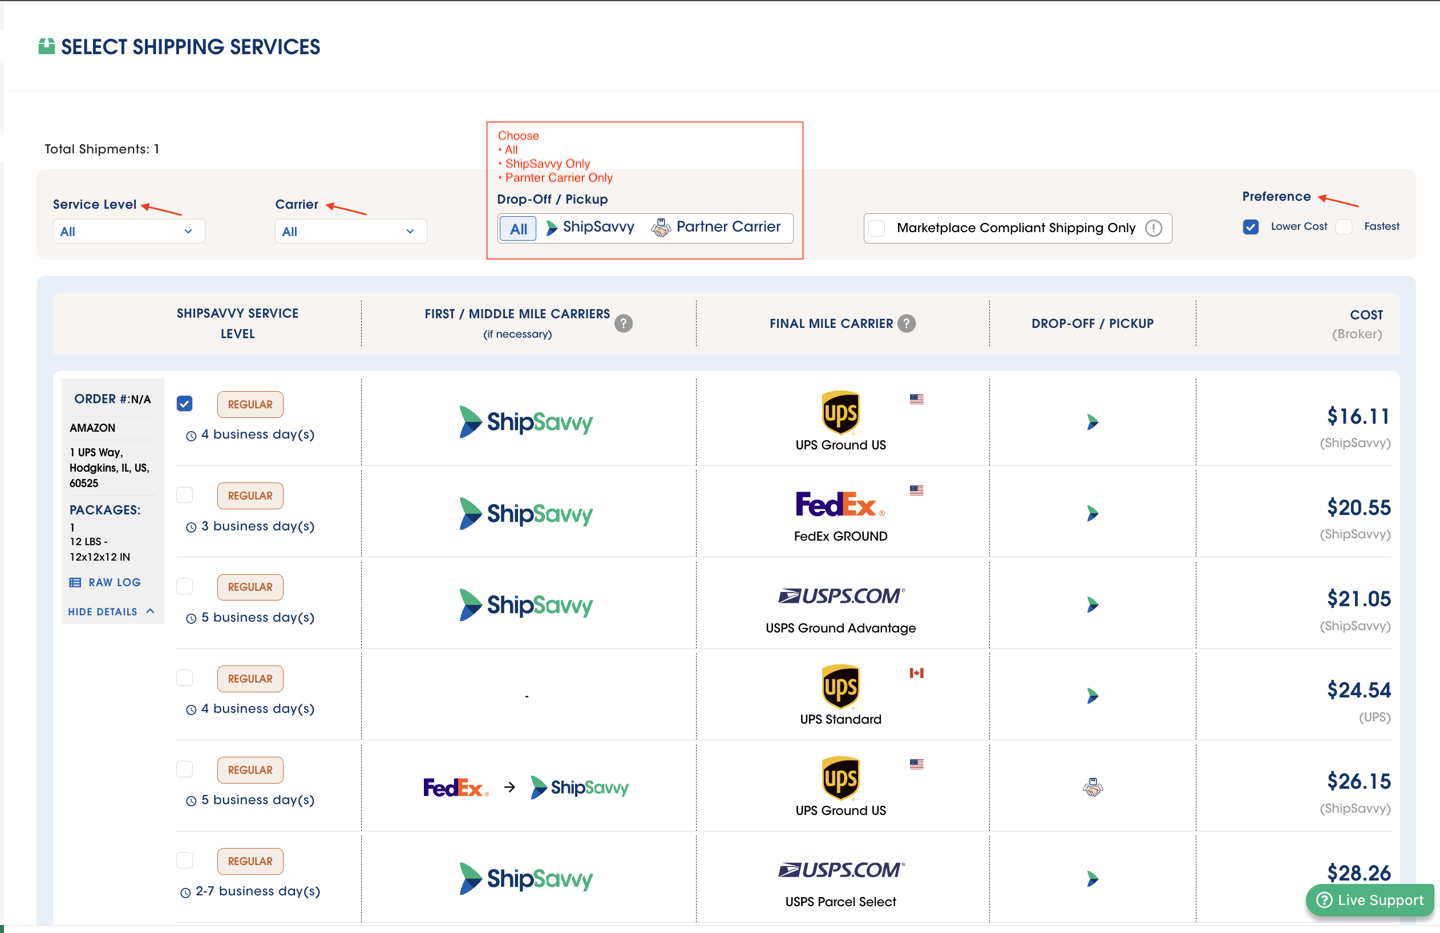
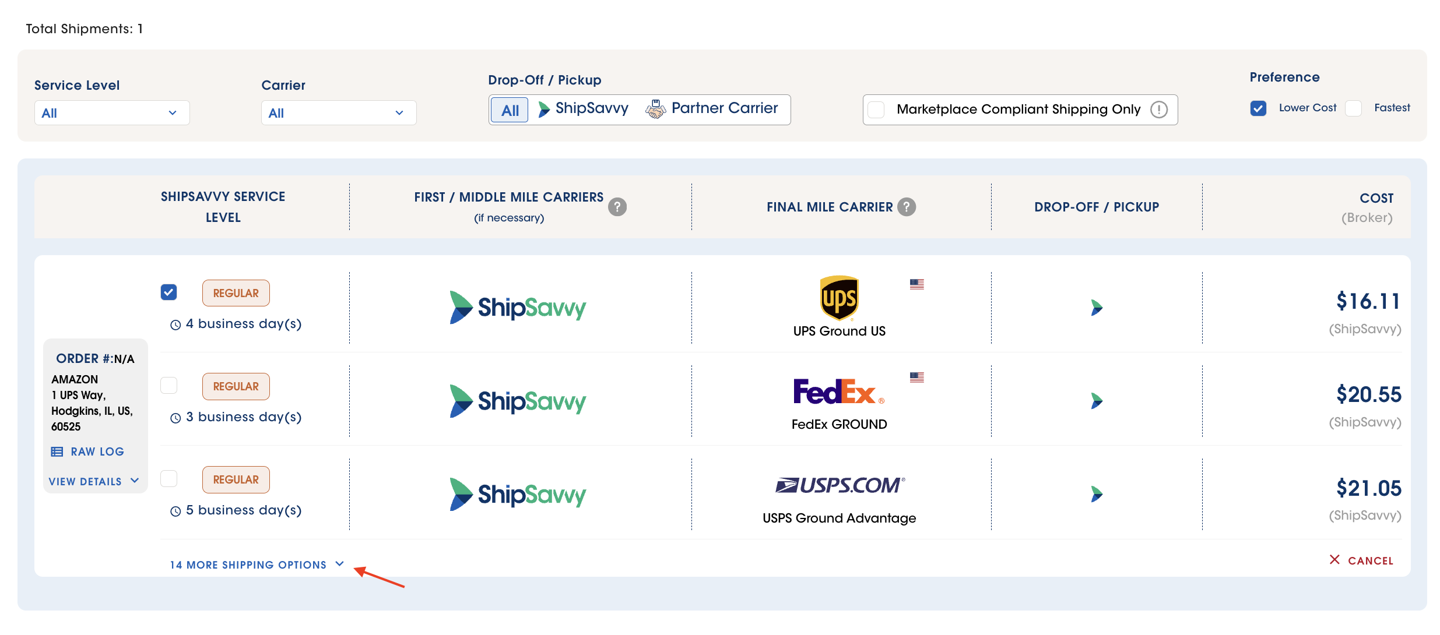
11. If you want more choices, click More Shipping Options.
Quick tip: Most customers start with Lowest cost first, and then only if there are other business reasons to need faster service levels, then you can consider all of those options.
Confirm and create the shipment
Click the option you want.
Review the price, delivery speed, and service details.
Click Pay Now.
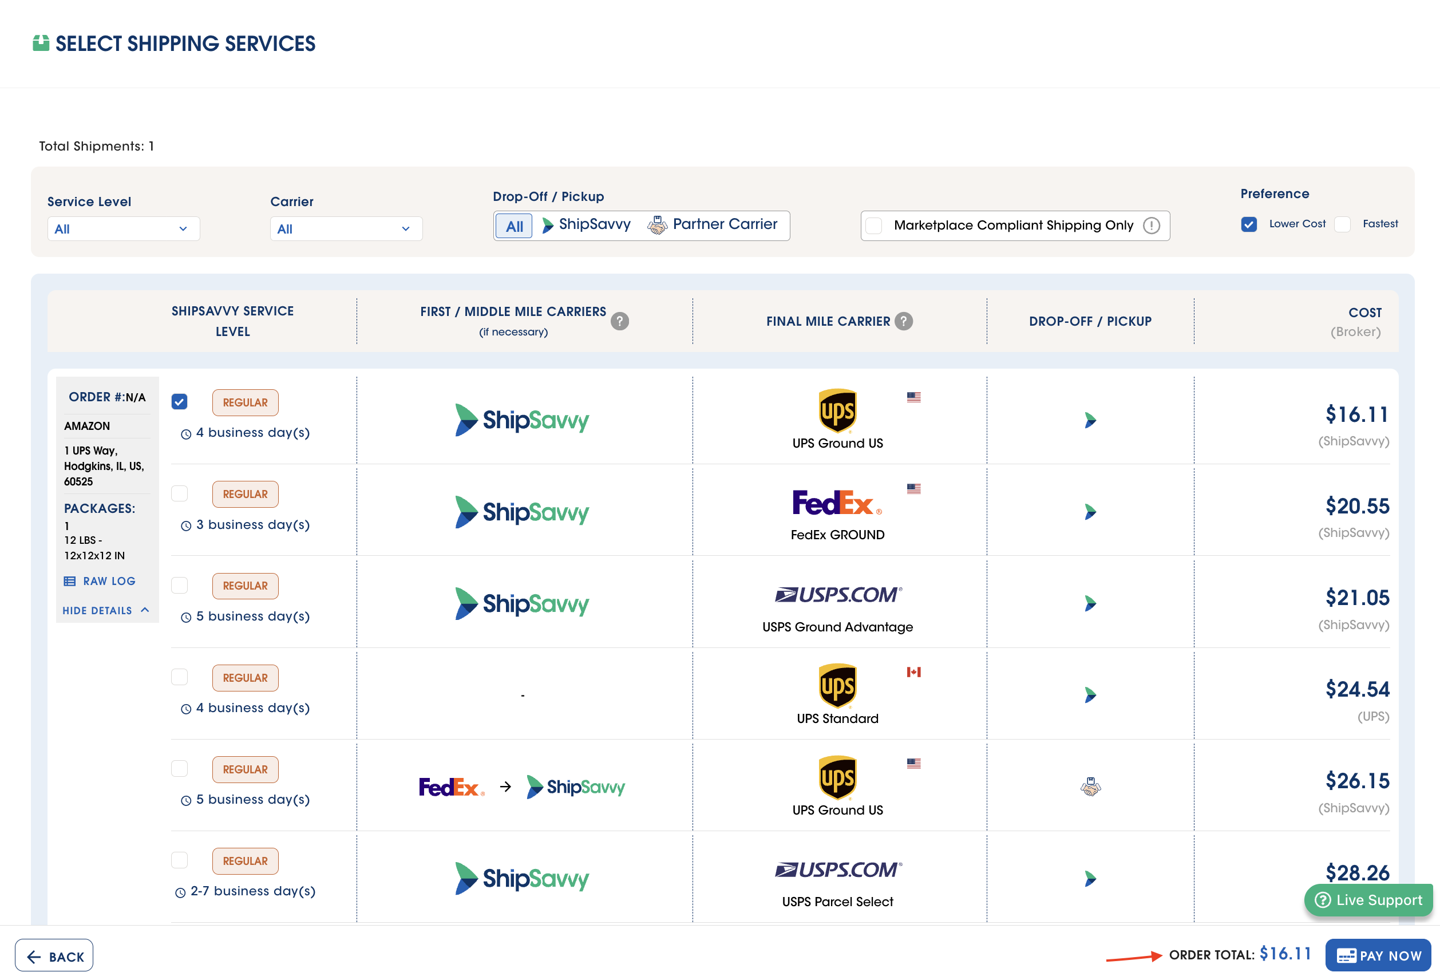
Your shipment is now created.
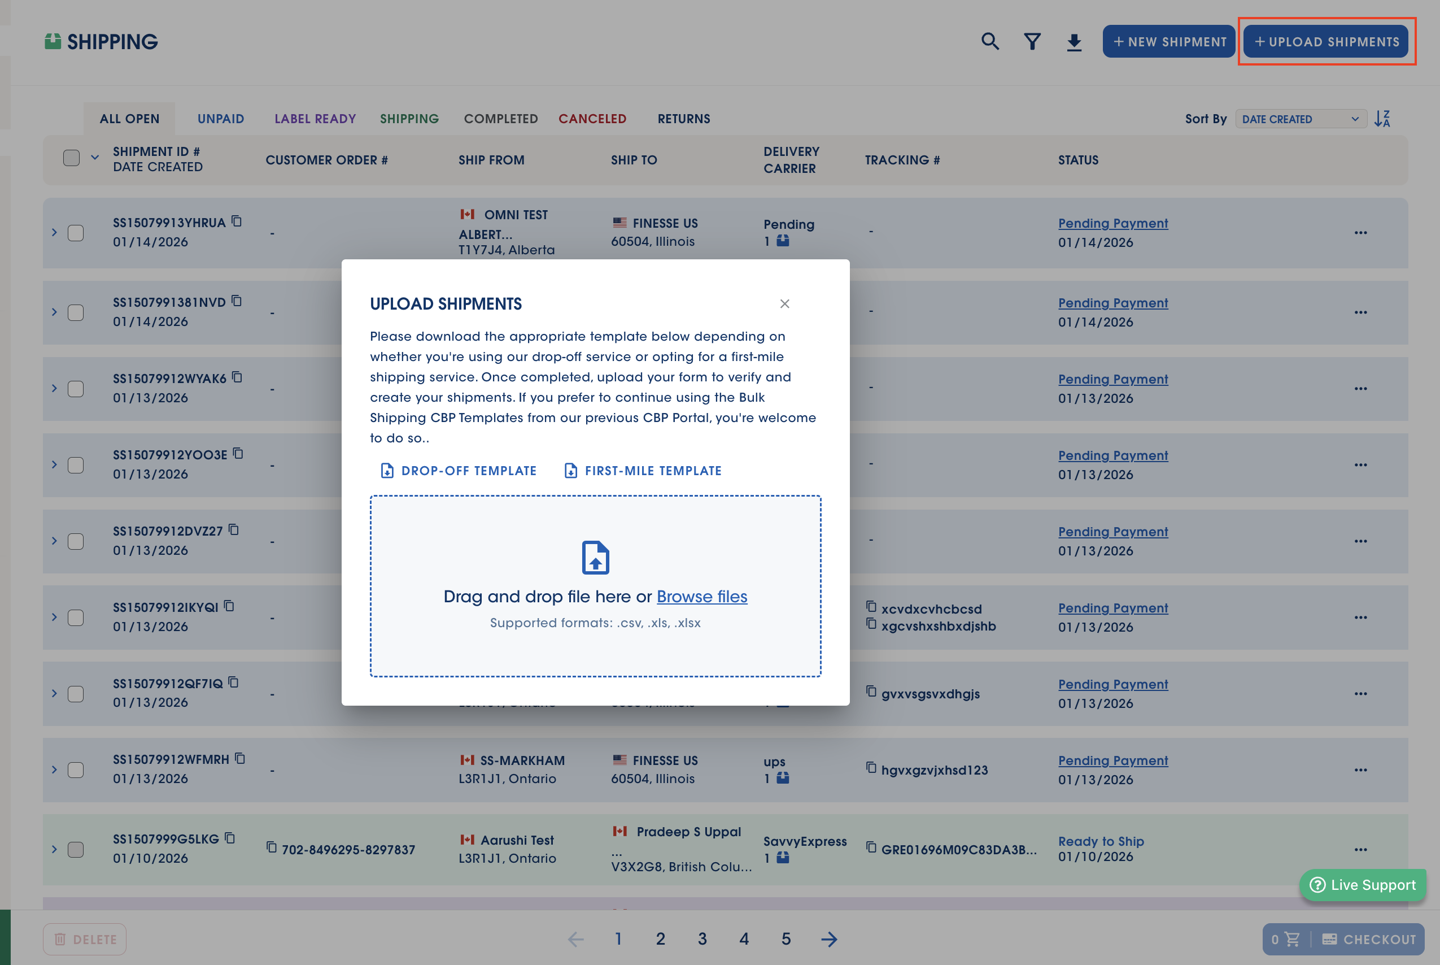
Bulk upload (template update)
There is now one bulk upload template (instead of separate drop-off vs first-mile templates).
The new template requires a Ship From address.
Older drop-off templates may still work for now, but users should switch to the new template.
Quick troubleshooting
I don’t see any drop-off options.
Double-check your Ship From address. If it’s outside the supported FSA area, drop-off options may not appear.
There are too many options — I don’t know what to pick.
Use Preferences → Lowest cost first, then pick a familiar carrier/service.
Did my drop-off location get saved?
Not at creation. The scanner records where it was actually received.
Was this article helpful?
That’s Great!
Thank you for your feedback
Sorry! We couldn't be helpful
Thank you for your feedback
Feedback sent
We appreciate your effort and will try to fix the article