SavvyAPI is ShipSavvy's Public API — think of it as a bridge that lets your own store, app, or platform talk directly to ShipSavvy. Instead of logging in and doing things by hand, your software can create shipments, pull tracking updates, and print labels automatically.
Getting set up is simple: everything happens in your regular ShipSavvy account. There's no separate sandbox site or extra sign-up, you'll grab your API token and choose whether it runs in Test or Live mode, right from the same screen.
1. Log In to Your ShipSavvy Account
- Go to my.shipsavvy.com and log in. Don't have an account yet? Sign up first — no separate testing account is needed.
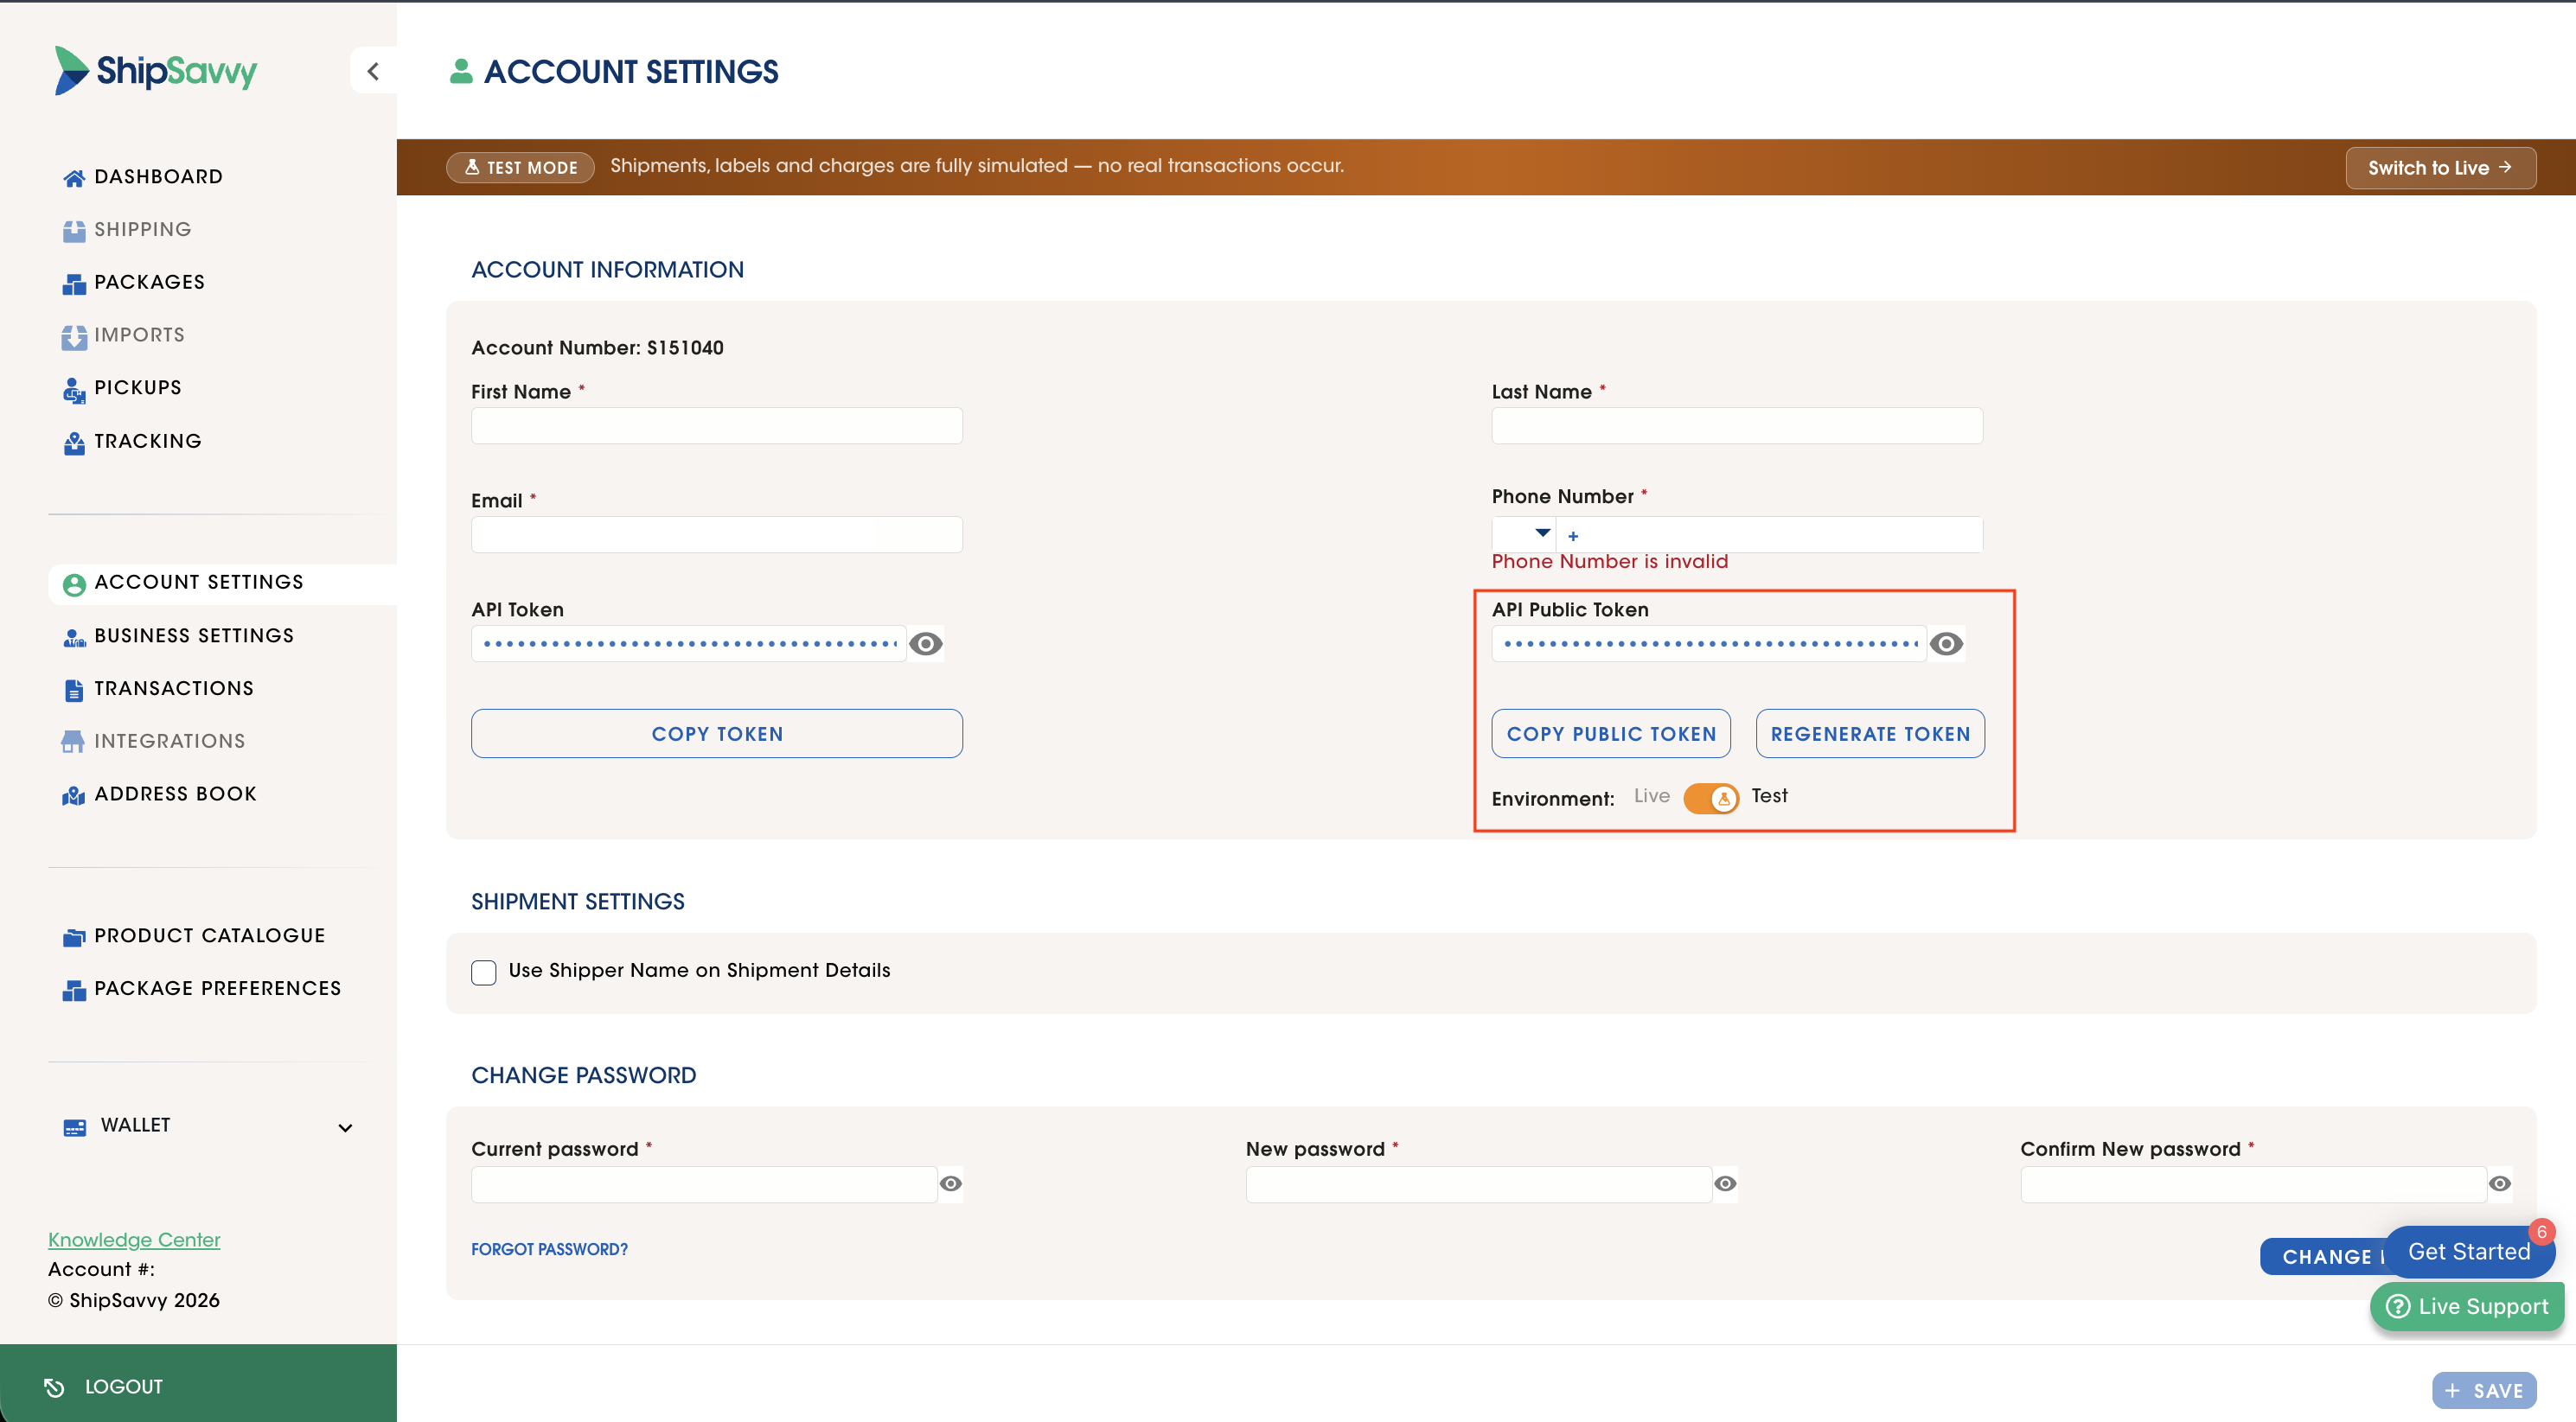
- In the left menu, click Account Settings.
2. Get Your API Public Token
- Under Account Information, find the API Public Token field.
- If a token already exists, click Copy Public Token.
- To generate a new one, click Regenerate Token.
3. Choose Test or Live Mode
Right next to your token, you'll see an Environment toggle set to either Live or Test:
- Test mode — shipments, labels, and charges are fully simulated. Nothing real happens, so it's safe to try things out while you build your integration. A banner at the top of the page will confirm you're in Test Mode.
- Live mode — real shipments, real labels, real charges. Switch over once you've confirmed everything works the way you expect.
Toggle between the two anytime — your API token stays the same either way, so there's nothing to swap out in your code except flipping the switch in your account.
4. Explore the API Documentation
Visit the ShipSavvy API Docs to see everything SavvyAPI can do. Here's what each endpoint means for you in practice:
| Endpoint | What It Lets You Do |
|---|---|
| Rates | Get shipping cost estimates before you commit to a shipment. |
| Shipments | Create, update, or cancel shipments directly from your own system. |
| Labels | Generate shipping labels that are ready to print and stick on the box. |
| Tracking | Pull real-time delivery status so you and your customers always know where a package is. |
The docs also include required request fields, sample payloads, and example responses for each endpoint.
Next Steps
- Use your API token to authenticate requests while in Test mode.
- Test endpoints thoroughly, then flip the Environment toggle to Live when you're ready — no new keys or setup needed.
- Contact the ShipSavvy support team if you run into anything during setup: customerservice@shipsavvy.com
Was this article helpful?
That’s Great!
Thank you for your feedback
Sorry! We couldn't be helpful
Thank you for your feedback
Feedback sent
We appreciate your effort and will try to fix the article